192.168.0.1 is more than just a series of digits; it’s your portal to manage your home network. This default IP address, commonly used by routers like TP-Link (TL-WR845N), D-Link, and NETGEAR, is your key to accessing many settings. Let’s explore how you can navigate this digital doorway to enhance your internet experience.
Here are the steps
Guide to 192.168.0.1 Login IP Address
Accessing your router’s admin panel at 192.168.0.1 is straightforward:
- Open Your Browser: Launch the web browser you use for internet access.
- Enter the IP Address: Type 192.168.0.1 in the address bar and press Enter.
- Login Prompt: A login page will appear. Commonly, the username and password are both “admin”.
- Successful Login: You’ll access the admin panel once you enter the correct credentials.
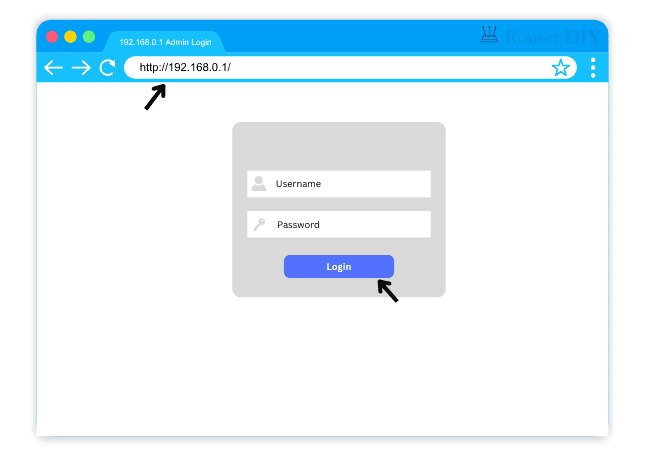
Note: Ensure you type the router IP address correctly. Common mistakes include typing 192.168.o.1 or adding unnecessary prefixes like “www” or “https”.
Customizing Your WiFi Credentials
Changing Network Name (SSID) for NETGEAR/TP-LINK
- Log into NETGEAR or TP-Link Router: Enter 192.168.0.1 in your browser (depending on the model number, the default gateway differs).
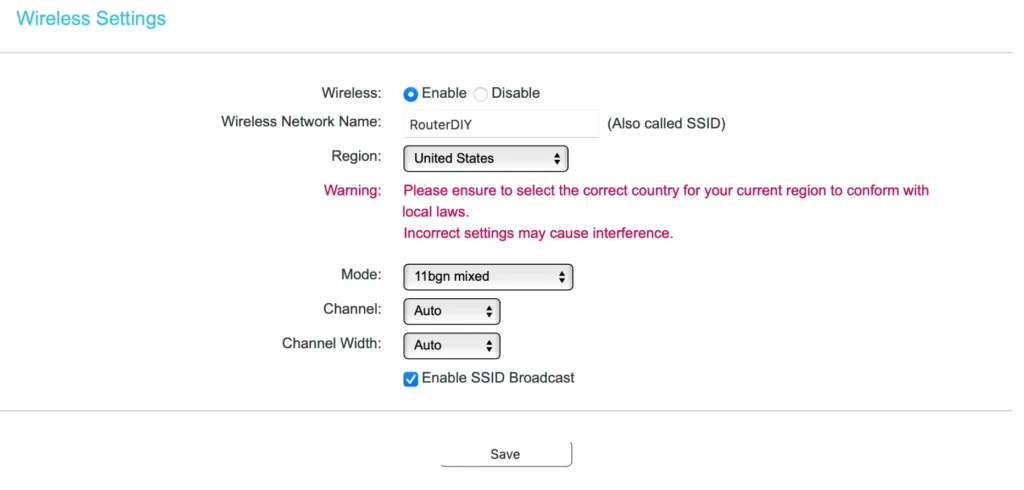
- Wireless Settings: Go to Wireless and select Basic Settings.
- New Service Set Identifier: Enter your desired network name and save.
Changing WiFi Password for D-LINK
- Access Admin Interface: Go to 192.168.0.1 and log in with the default credentials that can be found beside the router.
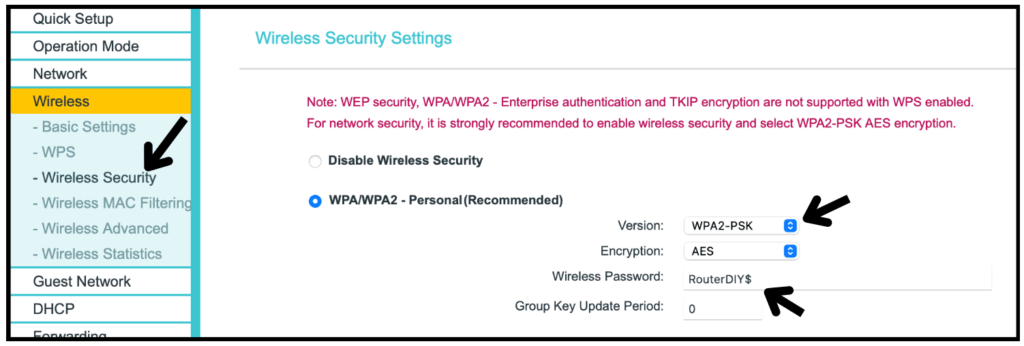
- Locate Wireless Settings: Find the Wireless Security page to change some significant info.
- Set New Password: Choose a robust password and enter it. Ensure WPA/WPA2 security is enabled.
- Save and Reboot: After saving, your router will restart. It will take some time. Use the new password to reconnect.
Few Solutions: Unable to Access 192.168.0.1
If you’re having trouble accessing 192.168.0.1, it could be due to incorrect IP address entry, network issues, or a disconnected router. Ensure your devices are connected to the router and that you’re entering the correct IP address.
To resolve these kinds of problems, follow the steps mentioned below.
Check your WiFi connection: It is necessary to connect your Smartphone or Laptop to the broadcasted WiFi network to modify your router’s settings. It is optional to have an active internet connection. However, the phone or laptop should communicate with the wireless router to access 192.168.o.1.
Find the correct gateway IP: The default gateway address varies from each router model. It might be another address like 192.168.1.1. Find out the valid default gateway address for your device.
Clear browser cache: It is recommended to clear the browsing history, cookies, and cache of your active browser before trying the above steps.
How to Clear The Cache?
To reset browsing history and cookies in Google Chrome:
- Click on the menu in the top right corner.
- Select More Tools, then Clear Browsing Data.
- Finally, press Clear Data.
In Safari, navigate to Preferences, then Privacy, and select Manage Website Data, followed by Remove All.
For Mozilla Firefox, go to Settings, Preferences, select Privacy and Security, choose Cookies and Site Data, and click Clear Data.
Try changing the web browser: There would be some compatibility issues. So, try changing the browser to Chrome/Safari/Mozilla.
Practical Tips for Effective Router Management
- Regular Firmware Updates: Keep your router’s firmware updated for optimal security and performance.
- Guest Networks: Consider setting up a guest network for visitors, keeping your primary network secure.
- Parental Controls: Utilize parental controls to manage internet access effectively.
Following the above guidelines, you can effectively manage your router settings, ensuring a secure and efficient home network. Understanding and managing your router is crucial in maintaining a safe and smooth digital experience in your home.